Saba Begum 2 years ago
Are you planning to move your WordPress website from AWS Lightsail to a new hosting provider like Bluehost? While the thought of migrating your site can be daunting, with the right steps, you can make the transition smooth and hassle-free. In this comprehensive guide, we’ll walk you through the entire process of migrating your WordPress site from AWS Lightsail to Bluehost, ensuring that your website remains intact and functional throughout the process.
Before we dive into the migration process, let’s briefly discuss why you might want to consider moving your WordPress site from AWS Lightsail to Bluehost. While AWS Lightsail is a great platform for hosting WordPress sites, Bluehost is a well-established and WordPress-recommended hosting provider that offers a range of features and benefits specifically tailored for WordPress users.
Some key advantages of using Bluehost for your WordPress site include:
1. WordPress Optimized Hosting: Bluehost offers hosting plans designed specifically for WordPress, providing optimal performance, security, and compatibility with the latest WordPress versions and plugins.
2. User-Friendly Control Panel: Bluehost’s cPanel interface is intuitive and user-friendly, making it easier to manage your website, databases, email accounts, and other hosting features.
3. Reliable Uptime and Performance: With their robust infrastructure and advanced caching technologies, Bluehost ensures high uptime and fast page load times for your WordPress site.
4. Dedicated WordPress Support: Bluehost provides 24/7 support from WordPress experts, ensuring that you get prompt assistance with any issues or questions related to your WordPress site.
Now that we’ve covered the reasons for migrating, let’s dive into the step-by-step process of moving your WordPress site from AWS Lightsail to Bluehost.
Before we begin the migration process, we need to gather the necessary files and database from your AWS Lightsail instance. Here’s how you can do it:
1. Log in to your AWS Lightsail account, and navigate to the instance you want to migrate.

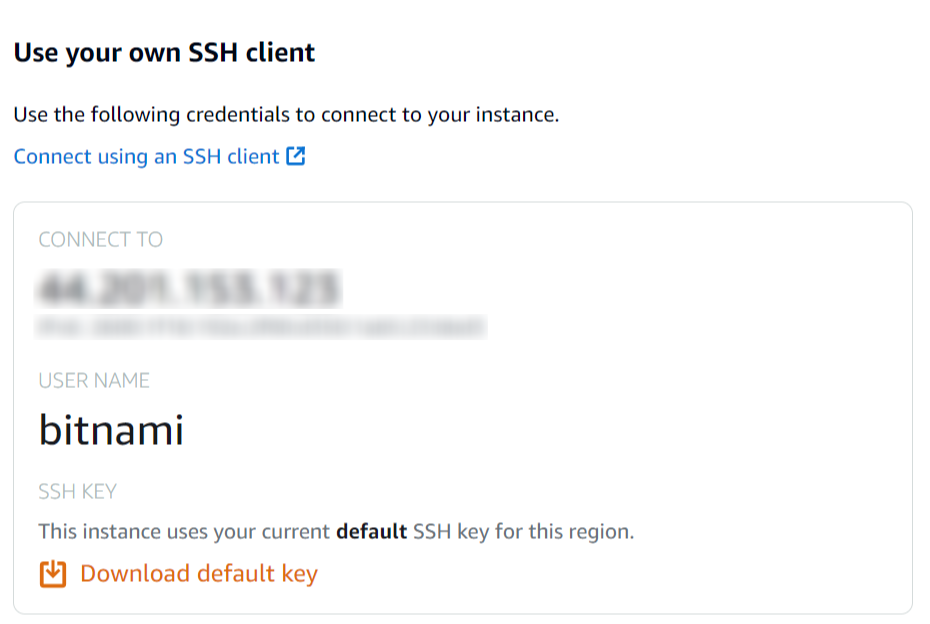
2. Connect to the instance via SSH using a tool like PuTTY. You’ll need to download the private key from AWS Lightsail or create a new one. To create a new SSH key, follow these steps:
a. Click on the “Account” menu at the top right corner, and select “SSH Keys”.
b. Click on the “Create SSH Key” button.
c. Once the key is created, download the private key file (with the `.pem` extension).
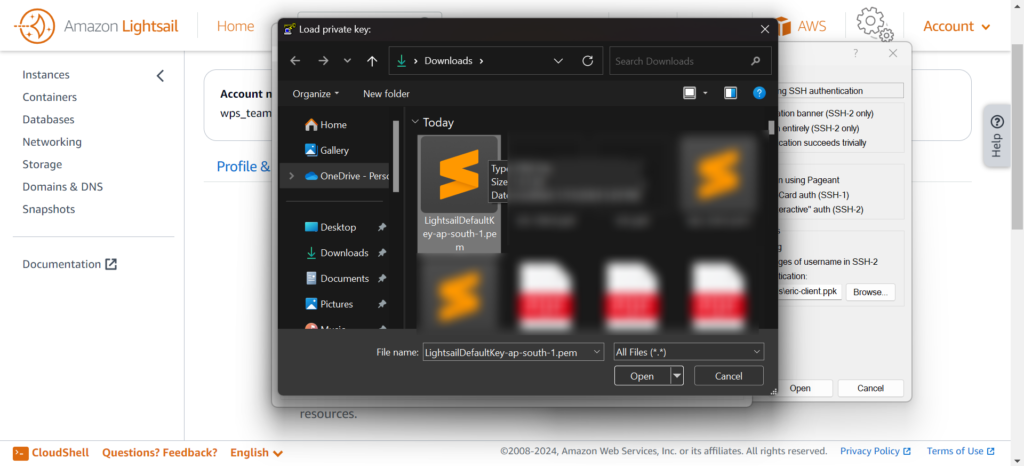
3. Start PuTTYgen and load the private key file you downloaded from AWS Lightsail:
a. Select “File” > “Load Private Key”, and choose the `.pem` file.

b. Click “OK” to confirm the import.
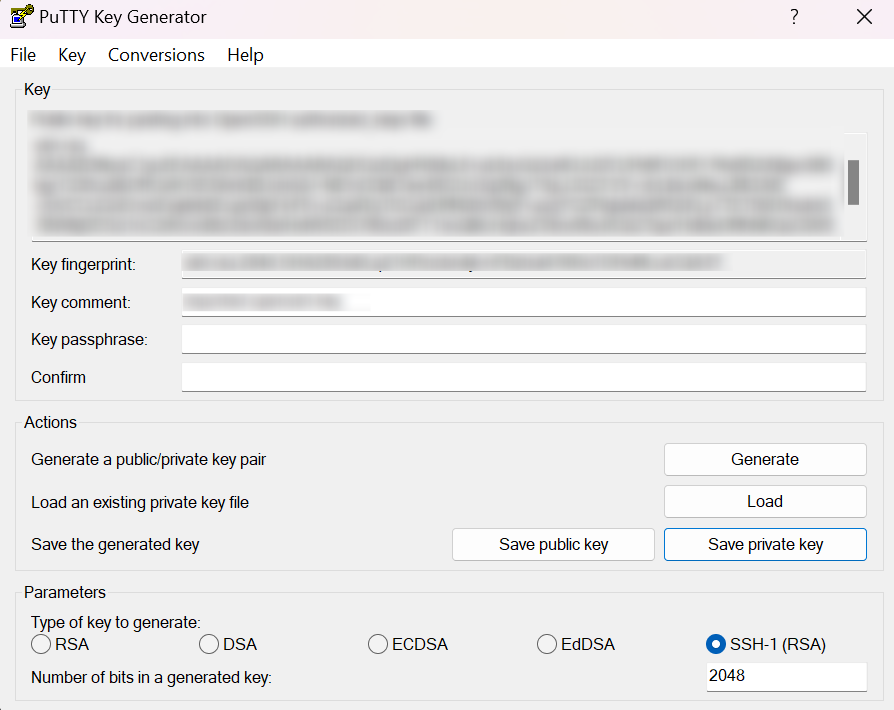
c. Save the private key in the PuTTY proprietary format (`.ppk`) by selecting “File” > “Save Private Key”.
4. Open PuTTY, grab the public IP address from the Lightsail instance page, and paste it in the “Host Name (or IP address)” field. Select the connection type as “SSH”.
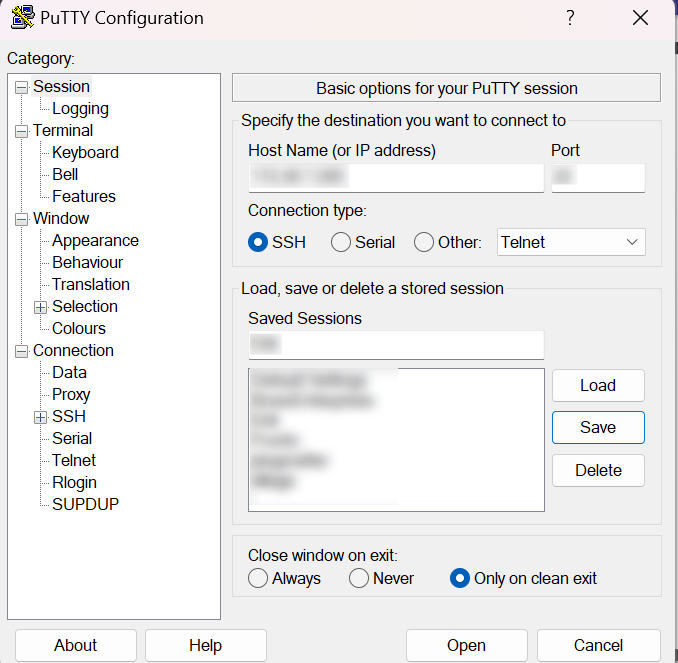
5. In the PuTTY configuration window, navigate to “Connection” > “SSH” > “Auth”. Browse and select the `.ppk` private key file you generated earlier.
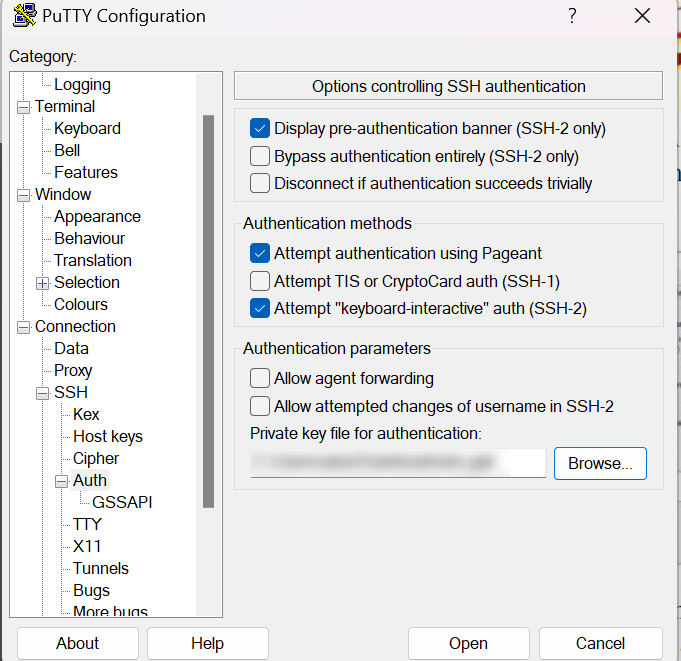
6. Click “Open” to establish the SSH connection. Log in using the default username ‘bitnami’.

7. Once connected via SSH, navigate to the WordPress folder and create a ZIP file of the entire directory using the following command:
zip -r filename.zip foldername/
8. To compress specific files (e.g., `index.php` and `wp-config.php`) into a single ZIP file, use this command:
zip filename.zip index.php wp-config.php
9. Download the ZIP file containing your WordPress files using an FTP client like FileZilla by connecting to the instance’s public IP address.
Select Protocol as SFTP, paste the IP address on Host input, then select the logon type as the key file, enter the user “bitnami”, and browse the key file that we generated from PuTTYgen and connect it, it will show the files.

10. Export your WordPress database by running the following command in SSH:
mysqldump -u DATABASE USERNAME -p -h localhost DBNAME –single-transaction –quick –lock-tables=false > /opt/bitnami/wordpress/backup.sql
Replace `DATABASE USERNAME` and `DBNAME` with your actual database credentials.
Now you have both the WordPress files and the database backup ready for migration.
1. Log in to your Bluehost account and navigate to the cPanel.
2. In the File Manager, upload the ZIP file containing your WordPress files to the `public_html` directory, and extract it there.
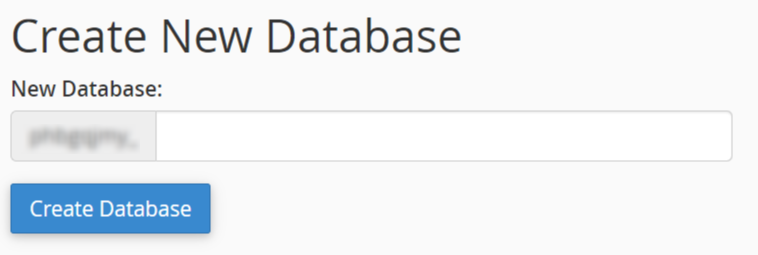
3. Navigate to the “Databases” section in cPanel, and create a new MySQL database for your WordPress site.
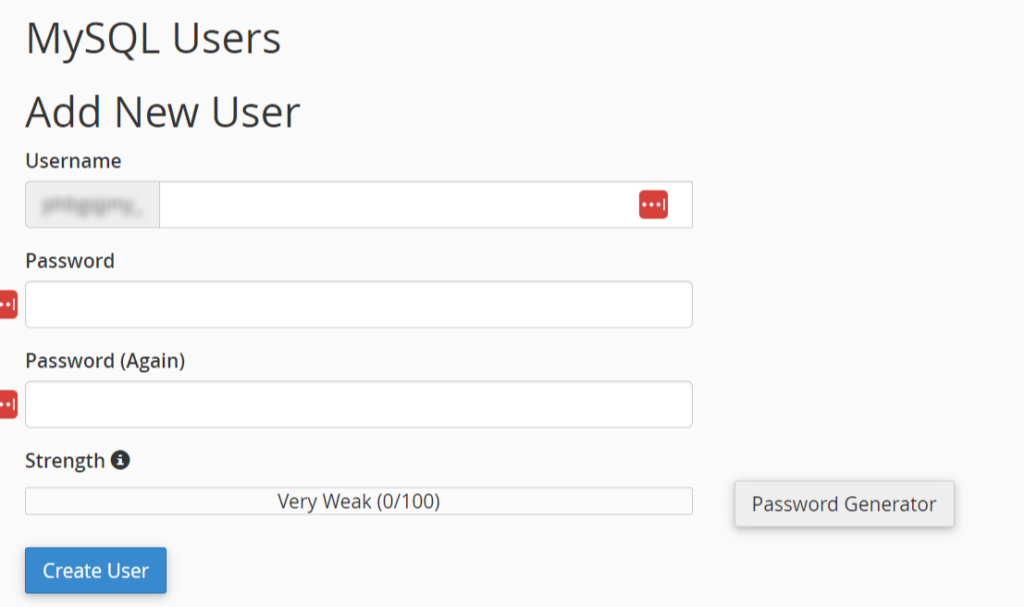
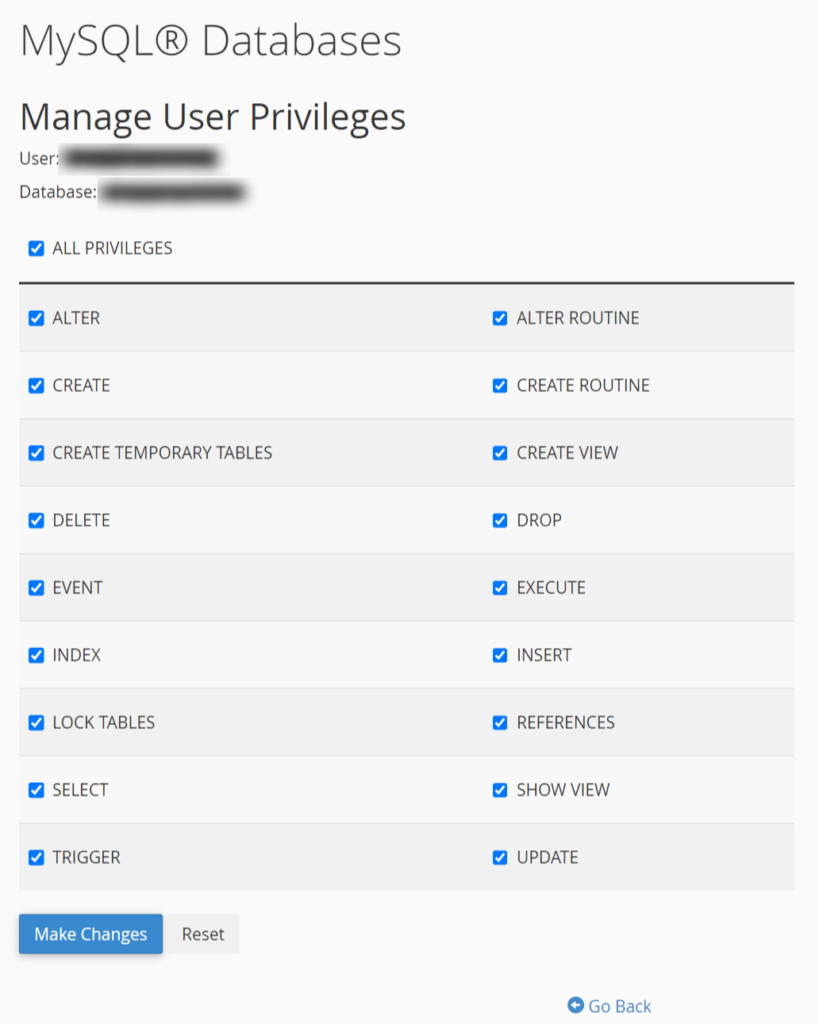
4. Create a new database user and assign it to the newly created database with all privileges.
1. In cPanel, open PHPMyAdmin and select the database you just created.
2. Click on the “Import” tab at the top, and select the SQL file you exported from your AWS Lightsail instance.
3. Click “Go” to import the database.
1. Go back to the File Manager in cPanel, and locate the `wp-config.php` file in the `public_html` directory.
2. Edit the file and update the database name, username, and password to match the new database credentials you created in Bluehost.
The final step is to update your domain’s DNS records to point to your new Bluehost hosting server.
1. Log in to your domain registrar’s account (e.g., GoDaddy, Namecheap, etc.).
2. Navigate to the DNS settings for your domain.
3. Add a new A record or update the existing one with the IP address provided by Bluehost.
4. If you’re using Bluehost’s nameservers, update the nameserver (NS) records with the ones provided by Bluehost.
It may take up to 24 hours for the DNS changes to propagate fully across the internet.
And that’s it! You’ve successfully migrated your WordPress site from AWS Lightsail to Bluehost.
While the migration process outlined above should work smoothly for most WordPress sites, there are a few additional tips and considerations to keep in mind:
1. Backup Everything: Before attempting any migration, always create a complete backup of your WordPress site, including the database and files. This will ensure that you can revert to the previous state if anything goes wrong during the migration process.
2. Test the Migration: If possible, consider testing the migration process on a staging or development site before applying it to your live production site. This will help you identify and resolve any potential issues before affecting your live site.
3. Update URLs and Permalinks: After the migration, you may need to update your WordPress site’s URLs and permalinks to reflect the new hosting environment. This can typically be done through the WordPress admin area or by modifying the `wp-config.php` file.
4. Check for Plugin and Theme Compatibility: Ensure that all plugins and themes you’re using are compatible with the new hosting environment. If necessary, update or replace any incompatible plugins or themes.
5. Monitor Site Performance: After the migration, closely monitor your site’s performance, including page load times, uptime, and any potential issues or errors. Bluehost’s support team can assist you if you encounter any problems.
6. Keep an Eye on Email: If you’re using email services provided by your previous hosting provider, you’ll need to set up new email accounts and update any configurations related to email on your WordPress site.
By following these steps and considerations, you can ensure a smooth and successful migration of your WordPress site from AWS Lightsail to Bluehost, without any significant downtime or data loss.
Migrating your WordPress site to a new hosting provider can be a daunting task, but with the right guidance and support, it can be a seamless process. If you’re feeling overwhelmed or uncertain about any aspect of the migration process, consider reaching out to Plugmatter’s WordPress Maintenance and Support service.
At Plugmatter, we have a team of experienced WordPress professionals who can handle the entire migration process for you, ensuring a smooth transition without any headaches or downtime. Our experts will take care of everything from backing up your site, setting up the new hosting environment, and configuring all the necessary settings to ensure your WordPress site is up and running seamlessly on its new host.
Additionally, our WordPress Maintenance and Support service offers ongoing maintenance, security monitoring, performance optimization, and expert support, so you can focus on growing your business while we take care of the technical aspects of your WordPress site.
Don’t risk the success of your WordPress migration or the ongoing health of your website. Let the professionals at Plugmatter handle it for you. Contact us today to learn more about our WordPress Maintenance and Support service and how we can make your WordPress migration a stress-free experience.
Get weekly actionable tips, insights and case studies to maximize your results.