Khaled Khan 4 years ago
To Build a new WordPress site while the old site is live, can be intimidating. Fortunately, you can practice website creation on your local drive. You can experiment and learn in a secure environment. You can also take as much time as you need to make the adjustments you want.
While the current location remains active, there are several ways to create a new WordPress website. And to build a new WordPress site while the old site is live in the background, you DO NOT need to be a developer.
If you are concerned that switching to a WordPress Draft Website would affect your customers and visitors, it can take weeks to overhaul your website. If you try to redesign your current website, it could take even longer. Traffic to your website, its SEO standings, and its earnings all suffer. Fortunately, there are solutions to this.
You won’t have to worry about these risks if you carefully create a new site in WordPress. This post will teach you how to overhaul a website and transfer it to your live environment without experiencing downtime or activating maintenance mode.
If you’re an experienced WordPress developer, doing that should not be a problem, especially if your development work is being done locally or on a staging server, and it is only being pushed to the live site when it is complete. However, this may seem a little overwhelming if you’re new to WordPress.
So, how do you replace the WordPress site with another? How do you edit a WordPress site without going live? What exactly is a staging server, too?
Let’s learn a few of these things…
You might prefer to build locally rather than on your main web server for several reasons. First, since you won’t have to pay for your real-time server while creating, you can save a few months’ fees for production hosting. Additionally, you might just want to experiment with WordPress; in this case, investing in conventional web hosting would be pointless.
When developing, multiple plug-ins, themes, and database configurations must be added, removed, and tested. You should do this in a development environment because otherwise, your server will become bloated. The good news is that none of this is a concern for you.
Your previous static site stays precisely where it is while you install WordPress on your live server and work on it secretly. Once your new place is operational, you don’t need to move, migrate, or clone it; instead, you just need to copy and edit a few files and adjust a few parameters.
When you are offline or without an internet connection, there are various methods you can still develop and change your website. The most well-liked and frequently applied technique is to install a virtual server on your computer and utilize it to host your WordPress website.
This process can be carried out using Xampp. You may create virtual servers and work on websites without placing them on the public internet, thanks to Xampp, free software, and a very lightweight Apache distribution.
Additionally, you should consider the advantages of working with professional WordPress Development Services on the design of your new site. That is because it will be available from anywhere and will be built using the same WordPress platform as your live site while doing so.
Here are your four alternatives for creating a new WordPress website while maintaining the functionality of your existing one.
Go to the cPanel your site host has provided. Select File Manager by clicking. You should put your WordPress files in the public_HTML directory. In this section, you should make a new subdirectory.
By making a new folder, you can add a new directory. Make sure the folder’s name is unique and not already in use. Make sure the folder name is appropriate for your visitors because that is what they will type into the URL to access it.
It is better to avoid doing this because it will lead to blunders. Never, ever leave a space in the name of any of your files. If there are any gaps, hyphenate them. New Directory, for instance, ought to be New-Directory.
The freshly made folder is currently empty. WordPress must now be installed in the folder. Visit WordPress.org’s download page to get the WordPress files. Click the “Download WordPress 4.8.3” button to start the procedure. It will be a compressed version of the file you downloaded.
The WordPress-4.8.3 folder you just downloaded should be uploaded into the subdirectory folder you just created. You must unzip the file by selecting the extract option once it has been placed in the freshly formed directory. When it’s finished, a WordPress folder ought to show up. The compressed file may now be deleted.
You only have two tasks left at this point. Install WordPress by going through the installation procedure and making a new database for your subdirectory. Let’s initially concentrate on the Database section. Return to the main cPanel page and select MySQL Databases.
You must establish a new database, username, and password and grant the newly formed user the required permissions on this page. Simply fill out the required information as you move along, but don’t forget to save your login and password. To keep your work in each section, click on the corresponding buttons. The subfolder has to have WordPress installed at this point. Go to:
[ht message title=”” show icon=”” id=”” class=”” style=””] mstyle=”info”] www.ggexample.com/New-Directory [/ht message]
The name of the subfolder where you put the WordPress folder is New-Directory in the URL above. You will be in the WordPress installation wizard once the page has loaded. Put the correct information in the correct fields by following the directions. You will be requested to install WordPress after entering the data.
It’s conceivable that WordPress is already set up in the root directory. A 404 error will result from this, but it is simple to resolve. The following code should be copied and pasted into the.htacess file:
[ht message mstyle=”info” [title] [show icon] [id] [class] [style]] # FOLLOW WordPress
Congratulations, WordPress has been installed in your subdirectory. Remember that you may always modify the New-Directory name, and that it should be interesting. You can alter it whenever you like.
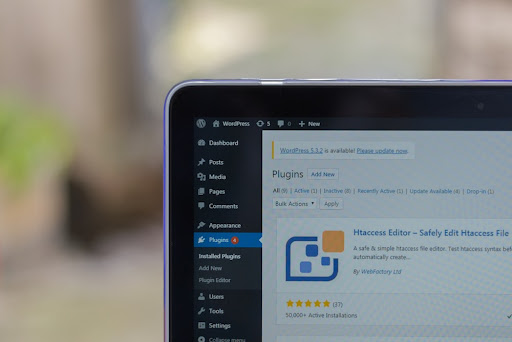
Installing WordPress in a subfolder doesn’t call for any additional setup. You are set to proceed if your root domain name already contains a WordPress website. Under the main website, you must first build a subdirectory or folder. You will install WordPress files here. Use an FTP client or the File Manager in cPanel to connect to your WordPress hosting account. Once connected, navigate to the website’s root directory. /public_html/ is often where it is located.
You will see your WordPress files and folders if WordPress is already installed in the root folder. When deciding on a name for your subfolder, you should exercise caution. This will be a component of the URL for your new WordPress website, which users will type into their browsers to access this website. For instance, if you give this directory the name travel-guides, the address of your WordPress website will be:
http://example.com/travel-guides/
Your recently created subfolder is currently empty. Change that by putting WordPress files online. You must pick the file you just downloaded and extract it. Windows users must right-click the file and then choose “Extract All,” Mac users can remove the file by double-clicking it. Use an FTP client to connect to your website, then navigate to the subfolder you set up in the first step.
Navigate to the ‘WordPress’ folder you just extracted in the local files section of your FTP programme. Select every file in the folder, then upload them to the newly created subdirectory.
WordPress keeps a database of all of your content. You must establish a new database to utilize your newly installed WordPress site in a subfolder. First, access your WordPress hosting account’s cPanel dashboard. In the databases section, select “MySQL Databases.”
The new MySQL database will now be created on your cPanel dashboard. To return to the Databases page, click the Go Back button.
The login and password for the database must then be added. Simply enter a new username and password in the “MySQL Users” section by scrolling down. To proceed, select the “Create User” button. You can now install WordPress because everything is ready. Simply enter the following URL into a web browser to access the directory you defined earlier:
http://example.com/your-subdirectory-name/
Next, you will be prompted to submit your WordPress database name, username, password, and host. Click the submit button after entering the database information. To proceed, select the “Run the install” button. You will be required to enter a title for your website as well as an admin username, password, and email address on the following screen. You can log in to it now that WordPress has been installed in the subdirectory.
Open the current version of your WordPress site and make sure everything is functional. You must create a backup of your website, including the contents stored in your web space and database. Download the website’s files to your computer, then store a backup of those data in a different folder for safekeeping.
Using phpMyAdmin, export your database, and as a backup, store a copy of the exported SQL file in a different folder on your computer. Upload your backup to the web space of your new domain by logging in via FTP. Don’t forget to unzip your backup file before uploading it if you used File Manager to create it. To phpMyAdmin, import the database backup.
Find the table wp options in the menu to the left after your database has been imported. The position of your site in the database needs to be changed next. In WordPress, you must now swap out your old domain’s login information for its new one. To ensure that it doesn’t affect your new site, take your old site offline. The files can be moved to a different folder to accomplish this.
Check out your new domain by opening it in your browser. You’re done if everything went according to plan. However, frequently, some manual fixes are still necessary. The links point to the old domain when photos don’t display correctly. By manually reintroducing images, you can correct this. Most of the time, your website has successfully been relocated, with all its photos and links.
Only if you genuinely want to be online does WordPress require hosting. You have the option of creating a WordPress website without ever making it live if that’s what you want to do, perhaps to familiarize yourself with the dashboard and all that it can accomplish. You can do it by following the procedures as mentioned above.
Whatever the case, your WordPress site will require hosting if you want it to be accessible to users worldwide and on the internet. Your website can be hosted for free on WordPress.com.
Both free and premium options are offered. Most WordPress users who host their websites on WordPress.com do so as a cost-free means of publishing their ideas and original works online. Most users who desire control over their websites—including aspects like monetisation—will, however, need to sign up for a premium plan with WordPress.com or another web hosting company.
Your options are covered when you replace an outdated WordPress site with a new one.
We’ve now discussed your alternatives for updating your current WordPress website while maintaining the one you currently have online. Because some solutions are more technically challenging than others, we Constantly advise using technology that makes your living Simpler. It is significantly easier to update your website or redesign it from scratch when combining the most OK WordPress hosting with the best theme. Hire a website integrator instead of a developer.
We discussed how to create a new WordPress website without an active internet connection. We also discussed the advantages of this feature, such as the capacity to edit your web pages while on the road or in the event of a lost internet connection.
The most popular method for setting up a virtual server and utilizing Xampp to modify your WordPress site locally was then covered. Today’s technology is developing quickly, and fashion trends are continuously evolving.
Therefore, if you manage a WordPress website, you’ll know that there’s always an opportunity for adjustment and improvement. Depending on how you choose to execute change, it can either be a time-consuming process or it can be quick and straightforward. The process can also be made simple with a dedicated WordPress maintenance service.
Manual processes demand technical expertise, a considerable investment of time, and significant effort. But fortunately, there is a trustworthy plugin for almost anything you need in the WordPress universe.
Khaled Khan is a WordPress developer who has been working in the industry for over six years now. He's currently employed as a Senior Engineer at Sizmic Labs, where he helps build a WordPress community of both developers and site owners. When Khaled isn't busy with work you can find him watching survival shows (the crazier ones are always better) cooking up something new in his kitchen -- or out exploring new places to eat in and around Hyderabad.
Get weekly actionable tips, insights and case studies to maximize your results.